I love docker. It makes environments:
- portable across any machine
- subject to version control (retraceable and recoverable history)
- easily deployed and discarded with simple commands
Jupyter is a great tool that allows for the creation of nice looking documents consisting of ordered code chunks with inline output. It is a fantastic way to get started with programming, clearly step through your workflow, and/or create stories and presentations out of your work. It runs in the browser after you install it on your machine (i.e. you access it with a URL in your web browser).

This walkthrough will get you set up with a jupyter lab (or jupyter notebooks classic) environment that is fully customizable, isolated, version controllable and portable using docker.
If you don’t want to use docker, you can always install jupyter the classic way. I like docker for the reasons outlined above (isolation, portability, version controllable, easily deployed/discarded).
1: Install Docker#
To install Docker, you’ll have to follow the instructions below:
Once installed, you’ll want to open a terminal (or cmd.exe for windows) and enter docker. You should see a long list of options and commands and not something like command 'docker' not found. If you see the long list, you’re ready to proceed!
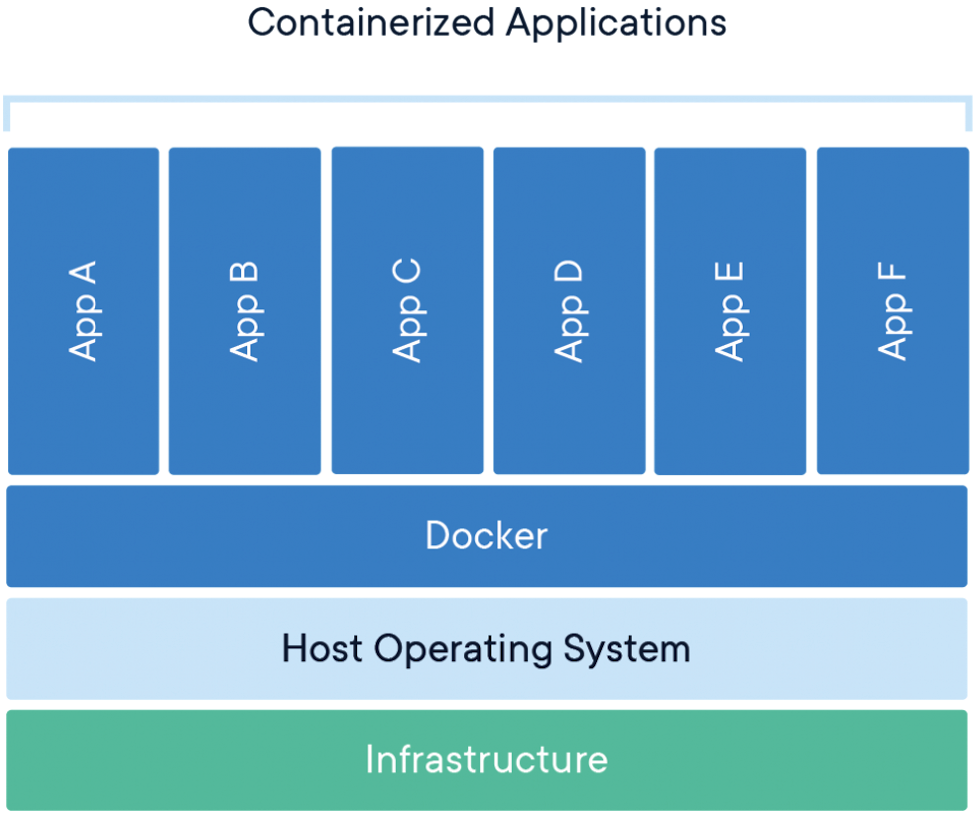
Docker uses the language of images (recipes for containers) and containers (instances of images). In this specific case, things like jupyter/minimal-notebook and jupyter/pyspark-notebook are images while our container will just be called juptyer.
I like to think of a container as an isolated environment that my app/service (in this case, jupyter) will run in, almost entirely isolated from the rest of my host machine.
2: Clone the <code>docker-stacks</code> Repo#
You’ll need git for this step, which you can install here if you don’t already have it. You can check by typing git in to the terminal and seeing if the command is found.
What you’ll clone is Project Jupyter’s docker-stacks. You can also fork this repo and clone your fork. We’ll go through adding a couple files to this repo that will make deployment and customizing things easy. You can use my fork or this tutorial as a reference. To clone the docker-stacks repo, run the following command in terminal/command prompt:
# run in the desired directory, e.g. ~/projects
git clone https://github.com/jupyter/docker-stacks.git
The docker-stacks directory we just cloned contains a lot of stuff. Open the folder in your favorite editor or just look at the repo here. We’re going to look at just a few bits of a few important files. First, the Dockerfile in the /base-notebook directory:
############################################
## docker-stacks/base-notebook/Dockerfile ##
############################################

# Copyright (c) Jupyter Development Team.
# Distributed under the terms of the Modified BSD License.

# Ubuntu 18.04 (bionic) from 2019-06-12
# https://github.com/tianon/docker-brew-ubuntu-core/commit/3c462555392cb188830b7c91e29311b5fad90cfe
ARG BASE_CONTAINER=ubuntu:bionic-20190612@sha256:9b1702dcfe32c873a770a32cfd306dd7fc1c4fd134adfb783db68defc8894b3c
FROM $BASE_CONTAINER

LABEL maintainer="Jupyter Project"
ARG NB_USER="jovyan"
ARG NB_UID="1000"
ARG NB_GID="100"
# ...
This Dockerfile specifies that all jupyter containers will derive from a Linux Ubuntu “bionic” OS (BASE_CONTAINER=ubuntu...).
If you examine the Dockerfiles for other directories, you’ll see there’s a chain of derivations that end in the base-notebook:
# minimal-notebook/Dockerfile, top section:
ARG BASE_CONTAINER=jupyter/base-notebook

# scipy-notebook/Dockerfile, top section:
ARG BASE_CONTAINER=jupyter/minimal-notebook

# datascience-notebook/Dockerfile, top section:
ARG BASE_CONTAINER=jupyter/scipy-notebook

# pyspark-notebook/Dockerfile, top section:
ARG BASE_CONTAINER=jupyter/scipy-notebook
The docker-stacks team has structured the project so you can specify how complicated of a setup you want out of the box based on what image you select. The jupyter/minimal-notebook image will contain the simplest installation you need for jupyter to run at all. The jupyter/pyspark-notebook image will come with a lot more, like a spark installation in the jupyter container file system (likely overkill unless you’re using pyspark!). Higher up images in the inheritance tree will include everything below them (e.g. pyspark-notebook contains everything from scipy-notebook, minimal-notebook, and base-notebook).
Custom File 1: Docker Compose#
The first file we add to the docker-stacks base repo is docker-compose.yml. The docker-compose tool is often used for orchestrating many containers (e.g. “bring up an nginx container and a jupyter container together so nginx can act as a reverse proxy and make the jupyter URL more user-friendly”), but here we only have one container (jupyter). I like to use docker-compose.yml as a way of version controlling a docker run command, which is typically used to bring single containers up. All docker-run commands can be translated into docker-compose files and vice versa.
You’ll create a docker-stacks/docker-compose.yml file that looks something like this (totally up to you to customize!):
############################################
## docker-stacks/docker-compose.yml ##
############################################
version: '3'

services:

    jupyter:
    container_name: jupyter
    image: jupyter/minimal-notebook # always get `latest` image on docker hub
    # image: jupyter/pyspark-notebook:1386e2046833 # tagged/pinned image example. check for updates here: https://hub.docker.com/r/jupyter/pyspark-notebook/tags.
    volumes:
        - ~/:/home/jovyan/work/
        - ./setup_envs.sh:/usr/local/bin/before-notebook.d/setup_envs.sh
    ports:
        - 9999:9999
    restart: unless-stopped
    environment:
        JUPYTER_ENABLE_LAB: 'yes'
    command: >
        sh -c "bash start-notebook.sh\
                --NotebookApp.token=$JUPYTER_PASSWORD\
                --NotebookApp.notebook_dir=/home/jovyan/work/\
                --port 9999"
Meaning of this witchcraft:
version '3': docker-compose specifies versions. They have slightly different syntax between themservices: our list of services here is just one service called jupyter that will create a container called jupyterimage: here is where you call out which image you want to use, as discussed abovevolumes: this is how you break isolation between the container and host environment, linking directories and/or files from the host to the container filesystems. This is important because otherwise when you destroy your container, your files would be lost with it. Syntax *host_path:container_path. Changes made in either host or container will reflect in the otherports: jupyter will run on a port in the container.portsbinds the host port to the container port. Syntax ishost_port:container_portrestart: unless-stopped: if your container fails, it will auto-restart unless you stop it with e.g*docker-compose downenvironment: specify environment variables.JUPYTER_ENABLE_LABenables jupyter lab by defaultcommand: this is the final command docker will run in the container upon build.NotebookApp.tokenpassword-protects your jupyter instance. The port here should also match the container port *portsabove
Custom File 2: Setup Script#
You may have noticed that the second volume specified in the docker-compose.yml file is called ./setup_envs.sh. This is a custom startup script that I use to do the following:
- Create environment variables that are accessible in jupyter
- Add jupyterlab extensions
- Create custom conda environments and link them to jupyter kernels
- Run other useful commands in the container upon startup (e.g. configure git, install
vimorsvn, etc.)
You’ll create a docker-stacks/setup_envs.sh file that looks something like this (totally up to you to customize!):
############################################
## example docker-stacks/setup_envs.sh ##
############################################
echo ""
echo "Creating useful environment variables..."
export MYVAR=$MYVAR
export MYVAR2=$MYVAR2
echo "Finished creating useful environment variables!"

echo ""
echo "Adding jupyterlab extensions..."
rm -rf /home/jovyan/work/extensions
mkdir /home/jovyan/work/extensions

# Great extension by calpoly for better markdown formatting in cells: https://github.com/jupytercalpoly/jupyterlab-richtext-mode
git clone https://github.com/jupytercalpoly/jupyterlab-richtext-mode.git /home/jovyan/work/extensions/jupyter-scribe && \
cd /home/jovyan/work/extensions/jupyter-scribe && \
npm install && \
npm run build && \
jupyter labextension link .

# Rebuild to get extensions to work
jlpm build
jupyter lab build
echo "Added jupyterlab extensions!"

echo ""
echo "Creating kernel py37..."
conda create -n py37 python=3.7.4 pip -y
echo "Finished creating kernel py37!"

# Install packages with pip, otherwise conda's "auto-checking compatibility" algo freaks out (with certain versions of conda)
echo ""
echo "Installing packages in py37..."
source activate py37 && \
pip install ipykernel && \
pip install pandas && \
pip install numpy && \
pip install scipy && \
pip install matplotlib && \
pip install seaborn && \
echo "Finished installing packages in py37!"

echo ""
echo "Connecting env to kernel..."
source activate py37 && python -m ipykernel install --user --name py37 --display-name "py37"
source activate py37 # must activate/deactivate once to have changes displayed
source activate base
echo "Connected env to kernel!"

cat << "EOF"

WELCOME!

     ██╗██╗   ██╗██████╗ ██╗   ██╗████████╗███████╗██████╗
     ██║██║   ██║██╔══██╗╚██╗ ██╔╝╚══██╔══╝██╔════╝██╔══██╗
     ██║██║   ██║██████╔╝ ╚████╔╝    ██║   █████╗  ██████╔╝
██   ██║██║   ██║██╔═══╝   ╚██╔╝     ██║   ██╔══╝  ██╔══██╗
╚█████╔╝╚██████╔╝██║        ██║      ██║   ███████╗██║  ██║
 ╚════╝  ╚═════╝ ╚═╝        ╚═╝      ╚═╝   ╚══════╝╚═╝  ╚═╝

Take it from here...

EOF
Dirty details on how this runs just by placing it in the container: the start-notebook.sh script run by the docker-compose command will subsequently run start.sh. Both these shell scripts are in the base-notebook directory. The start.sh script has “hooks” for running scripts that are in the /usr/local/bin/before-notebook.d. All this to say that setup_envs.sh will be run as part of your jupyter setup because we put it in the /usr/local/bin/before-notebook.d directory in the jupyter container!
Note that you could totally exclude the setup_envs.sh script and volume and your deployment would be fully functioning. I like to use this method as a way of customizing my jupyter setup in a version-controlled manner. Rather than installing a new python package in my base environment or installing a system package every time manually and trying to remember what I did when I port to a new machine, I’ll edit the setup_envs.sh script, commit and push to my fork, then redeploy on whatever machine I want and get the exact same setup.
3: Bring Up the Jupyter Container#
If you’ve gotten this far, you’re basically done! The one thing we’re missing is to set a password/token. In terminal, run this command with your custom password. If you don’t do this, docker-compose will warn you at the next step.
export JUPYTER_PASSWORD=$MY_CUSTOM_PASSWORD
You can now navigate to the docker-stacks directory in a terminal and run:
docker-compose up -d
The -d flag stands for “detached”, and ensures the jupyter container will stay running even if you exit the terminal.
You can now run:
docker logs -f jupyter
The -f flag standing for “follow”. Watch the progress in your terminal as your jupyter container is instantiated and your setup_envs.sh script is run (if you made one).
Once you see something like the following:
[I 16:19:04.574 LabApp] The Jupyter Notebook is running at:
[I 16:19:04.574 LabApp] http://3204808557f5:9999/?token=...
[I 16:19:04.575 LabApp]  or http://127.0.0.1:9999/?token=...
[I 16:19:04.575 LabApp] Use Control-C to stop this server and shut down all kernels (twice to skip confirmation).
You’re ready to go! Navigate to http://127.0.0.1:9999 (or whatever port you specified if different than 9999) where you should see a page that prompts you for your password (set with the JUPYTER_PASSWORD environment variable earlier).
You have a fully functioning and replicable jupyter environment, portable to any machine that runs docker! Remember that even though your container has access to your host file system through the volume we created, your file system isn’t (and shouldn’t be) version controlled with the docker-stacks directory. Version control your projects separately.
Further thoughts#
- Another approach to version controlled customization could be to modify the Dockerfiles themselves. I prefer the
setup_envs.shscript approach as rebuilding the images is time and disk space intensive. Modifying Dockerfiles, though, is a totally valid approach. - If you get stuck on anything in this process or see that I’ve been wrong/unclear about something, please open an issue on the source of this website here.